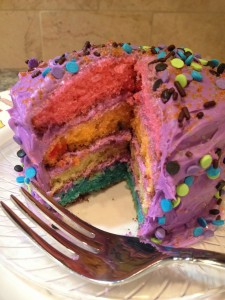
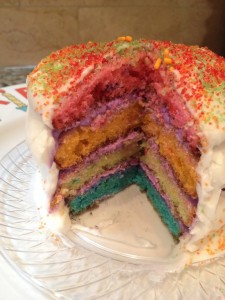
When my daughter turned 4 last month, she wanted a colorful cake. (“Like paint colors Mom!”). I figured she’d want pink and/or purple, since everything has to be pink or purple…but birthday girl gets to chose, so I decided to make a mini rainbow layered birthday cake.
I wanted to make it kid-sized….and I loved the end result!
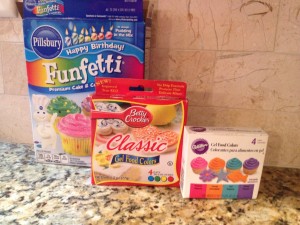
What you’ll need:
- Yellow or white cake mix (or your own homemade batter recipe)
- Frosting of your color (pre-made or homemade)
- Food color gels or food coloring
- Muffin top pans
- Mixing bowl
- Smaller prep bowls (for dividing batter)
- Optional: sprinkles, candles, miscellaneous decor
1. First you will need to prep your cake batter. Follow instruction on the box or your homemade recipe and mix it in one mixing bowl.
My daughter wanted Funfetti batter, but once the colors were added, you couldn’t even tell it was Funfetti. So I would forego the Funfetti cake 🙂
2. Divide your batter in the smaller prep bowls. Divide into how many different colored cake layers you will be making.
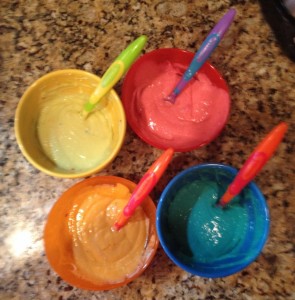
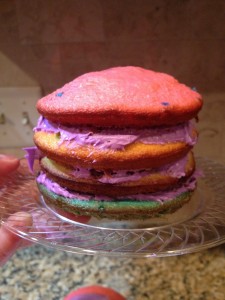
We did 4 colors, so I divided the batter into 4 bowls. I just used my kids’ bowls that I have a plethora of.
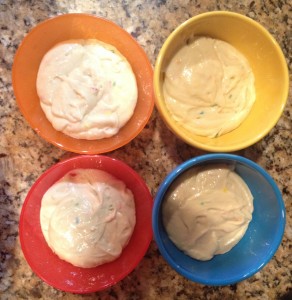
3. Add food coloring gels to the batter. Chose whatever colors you would like and mix thoroughly.
I love the food color gels because they give you such vibrant colors.
4. Place the batter into the muffin top pans.
We had enough batter to make 3 mini cakes, so I divided it as seen below. 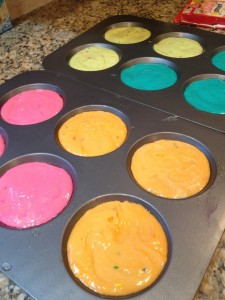
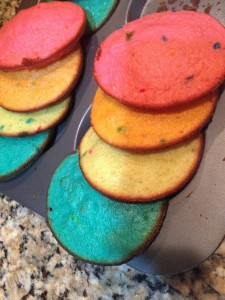
5. Bake your cakes according to the box or recipe.
(Check on it earlier than you think, just to make sure you don’t over-bake it…no one likes a dry cake!)
6. Start layering the cake by laying down a circle, placing frosting on top, then putting another circle on top. Repeat this with each of your different colors.
Put as little or as much frosting in between layers as you would like. There will be plenting of frosting on the outside, so you might want to take it easy on the frosting between layers, unless you REALLY love icing and want a huge sugar high 🙂
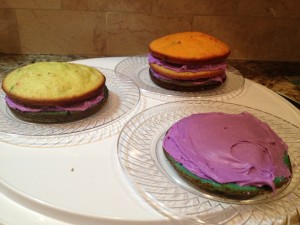
7. Once your layers are set, begin frosting the outside of the cake.
If you are going to put sprinkles on the outside, don’t worry so much about making the icing perfectly smooth.
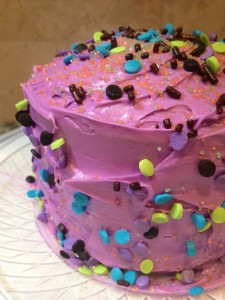
8. Cut it open and enjoy your new Rainbow Layered Mini Birthday Cake you just made! Your kids will love it too!